Tuesday, August 7, 2012

Jam Making for Jamaphobes

It's jam season!
Yum! Plum & star anise jam on top of local goat toma and organic walnut sourdough bread baked in a wood fired oven

Actually, it's been jam-making season for quite some time, but I've been too busy canning to write about it.  Even as I'm writing, I hear the plums insisting that I turn them into jam.  Ok, not really, but they are sitting there on the table, looking very tasty, and if they could talk, they would be saying 'Annie...Annie.... please take out our pits and make us into tasty jam!  That star anise over there would go really nicely with our juicy flesh....."

A lot of 'young' folks seem to jam-phobic.  People of our parents generation make the jam, and we eat it, for the most part.  However, making jam isn't difficult at all, and today I'll give you some guidelines on making delicious jam.

There are different types of jam out there.  I like following the French 'confiture' method, which you can read all about in Christine Ferber's book, 'Mis Confitures'.  She's the queen of jam, and recently when I was in Annecy, France with my mom, we both stopped in our tracks and simultaneously screamed like teenagers at a Backstreet Boys concert (do they even exist anymore?) because we saw some of her jam in a shop window. So, of course we bought some.

There are different types of jams, and different ways of making them.  Here are the things to think about:

-  Do you like you jam chunky, with big pieces of whole fruit, or smooth jam, or somewhere in between?
If you like it chunky, leave small fruits (like strawberries) whole, or cut into large chunks.   For smooth jam, cut fruit into medium sized pieces and blend jam with a stick blender right before canning.  For somewhere in between, cut fruit smaller or give your jam a short burst with a stick blender. 

-  How sweet do you like your jam?
In the US, I think many people do equal weights of fruit and sugar.  Christine Ferber's are nearly that sweet.  In Italy, I've learned to appreciate less-sweet jam, so I usually add 500 g sugar per 1000g fruit.  I go up to 650g or so for less sweet fruit, but I don't go under 500 g because I think the consistency becomes compromised and you have to overcook the fruit to get it concentrated enough to can.  I think 650 g sugar per 1000 g fruit is a good starting point,giving a good balance between sweetness (not overly so) and consistency.

- Do you want it for breakfast, or to go on cheese or meat?
I didn't really know about cheese and meat jams before I moved to Italy.  And boy am I glad to discover them!  These 'savory' jams aren't necessarily any less sweet, but they have herbs and spices in them that make them pair well well cheeses and meats.  With bleu cheese, I love apple & liquorice jam, and with Fontina I love plum & star anise jam, and for goat cheese I go for thyme jelly, for example.  Black pepper, rosemary, liquorice, star anise, cinnamon, ginger, thyme, fresh mint.... there are no limits to how creative you can get!  I like to use those things to cover up fruit flavors that I don't love (like plum, gross) so that I end up with jam that is tasty even if I don't usually like that kind of jam.

Ok, lets get down to business.

You need good, ripe fruit.  If the fruit doesn't taste great by itself, it won't make great jam.  The riper the better. The following method can work with pretty much any fruit.  I go by weight, because that is the most reliable, and will give a recipe based on 1 kg (2.2 pounds) of fruit, which is easily multiplied.  Also, no pectin. You really don't need the stuff. It is the jam making equivalent of using a store-bought frozen pie crust.


Equipment:
Big pot: ideally you should use something that is wider than it is tall.
Biggest pot you own (for sterilizing your jars)
Big spoon
Stainless steel strainer (for berry and other delicate fruit jams)
Thermometer (optional, but highly recommended)
Kitchen scale
2 little plates
Jar lifter (optional)
Jam funnel (optional)


Base ingredients:
1 kg fruit, peeled if necessary, and cut up
500-750 g sugar, depending on the fruit and your tastes
juice of one lemon

1) Mix it all together in a bowl, cover, and leave it refrigerated overnight.  If you can't wait, you can leave it for a couple of hours and it will be ok.  We are doing this so that the sugar goes into the fruit, and the water goes outside of the fruit.  This will help our fruit stay whole, so that it doesn't turn to mush.Really juicy fruit (like peaches) can be left for an hour and be ok to use, but little plums (like in some of my demo pictures) really need to be left overnight.
I like to cut my fruit into chunks like this
2) For berries, the next day, bring the mixture to a simmer for 10 minutes, and then cover and refrigerate overnight.  For everything that isn't a berry, just go onto the next step.

3) Put water (enough to cover your jars) in the biggest pot you own and put over a flame.  You want this to be boiling when you finish your jam, so plan accordingly.  Also, get your clean jars and clean never-before-used lids ready.  If they've been used, they won't seal.  I find I get about 4 large-ish normal jars per kilo of fruit, depending on if it is a high pectin fruit or not.  And put some small plates in the freezer. 

4)  For berries and other delicate fruits (I do this with peaches and figs, too),  strain out the fruit from the liquid.  Put the liquid in your pot over a medium flame, and in a while we will use the fruit, but not yet.  After a while it will start to make some foam, some fruits are worse about this than others.  Berries foam up like crazy.  With a big spoon, spoon off the foam, because we don't want it on there.  Stir regularly, making sure that it doesn't scorch.  After a while the liquid will stop foaming and it will go a little darker.  If you have a thermometer, when your syrup has reached 105 C (221 F), it should be nearly ready.  Otherwise, when your liquid has that dark-ish translucent look to it and starts to look syrupy in thickness (should take between 30 and 50 minutes), add your fruit back in and cook for about 10 minutes more.  Don't forget to gently stir! At this point I might zap it with the stick blender and add in whatever herbs or spices I'm mixing in, tasting as I add.
Peaches can be cooked all together, or strained out and added in later.  If the peaches are super ripe and falling apart, I strain them out and add the fruit in at the end.
This is what it looks like when it foams.  At this point start spooning off the foam.
After I spoon off the foam, and it cooks a bit more, it starts to get translucent looking

5)  After 10 minutes, take one of those plates you put in the freezer, and put a drizzle of jam on it.  let it sit for a minute or two and run your finger through it.  If the jam doesn't fill in your finger tracks, it's probably ready. It is ok if the jam partially fills it in after a while, you just don't want it completely liquid.  It can take making jam a good few times before you figure out exactly when it's ready.  Undercooked is better than overcooked, though.
I'd call this jam done
 
 Here are two super useful tools.  They aren't strictly necessary but I don't make jam without them:
Jar lifter and jam funnel
6) Ladle your jam into your clean jars.  The jam funnel is great here because it is fast and clean.... if you get water, condensation, or jam on the lip of your jar, it won't seal.  A more 'ghetto' and time consuming alternative, if you don't have stellar aim with a ladle, is to press aluminum foil around around the lip of each jar and spoon the jam in. Don't forget to take off the foil!  You want to leave at least a finger's breadth of air at the top of the jar.
Filling the jars with my super handy jam funnel

7) Cap immediately!  If you put the lip on immediately after putting the jam in the jar, the glass is still cool enough to tough without burning yourself.  Make sure to tightly close them.  Each country has a different sort of jar and lid system, so figure out what you have and make sure you know how to use it. Sometimes there are little tricks to making the lids close right.  The ones I get in Italy, I have to turn the lid a few millimeters counterclockwise until I hear a 'click' and then turn the lid clockwise to close.  I've heard people say that you should never put hot jam in a cool jar, but I've never found this to be the case, and none of the many professional jam makers I know have ever had a room temperature jar burst from hot jam.  If you are worried about this, you can warm your jars in the oven or in some boiling water, making sure they are dry when you put your jam in.

 8) Using the other handy-dandy tool, I put my closed jars in the boiling pot of water I prepared.  Make sure that there are at least 2 inches of water covering the jars.  Boil them for 10 minutes.  This is VERY important, it sterilizes your jam and your jars so that funk won't grow in them.  Take your boiled jars out, and let them cool without being disturbed.  Depending on your lid type, you will probably hear 'POP.... POP' as they start sealing. Please don't touch the tops or you won't be able to tell which ones have actually sealed!  Leave them be overnight and the next day check to make sure that the pop up thingy on the lid is sucked down towards the jar.  If you press the top of the lid at this point and there is some give, it's not sealed, so you need to refrigerate it.  Otherwise, keep in a cool dark place until opened!


Oh yes, and don't forget to label them.  I used to think that I'd remember which jam was which but let me tell you, you can't!  Happy jamming everyone!


Monday, July 9, 2012

Italian Men and Their Cheese


Italian men love to talk about their local cheese.  Within moments of meeting an Italian man, likely as not, they will wax poetic about the cheese of their particular village, and how it is better there than anywhere else.  Don't get the cheese from the neighboring town, it's not as good.  Their cheese is the REAL one.  They'll tell you how to eat it, what to eat it on, and recount recipes that you can make with their special cheese.  They'll ask if you've ever eaten their cheese, and if not they very well might invite you to come visit so that you can try their local cheesy delicacies. Italian women are just as proud of their cheeses, but they aren't likely to talk to you about it.  Instead they'll invite you over for dinner and feed you.  And while you eat, the men will keep telling you about the cheese. Perhaps stereotypical, but I've found it to be true in my experience.

Local jam on top of local goat/cow toma

Being in an isolated part of Italy, and not having traveled extensively outside of it, I thought this was perhaps a local phenomenon.  People from Valle d'Aosta are very proud of their Fontina.  Proud of their cows.  Proud of the recipes made with their cheese.  Considering that half of my posts have something to do with cows, that probably isn't surprising!  But yes, in Valle d'Aosta, Fontina isn't just a cheese, it is a way of life for many.  Even those who hate eating or smelling cheese (like my husband) are very proud of Fontina.  Real Fontina only comes from Valle d'Aosta, from a certain variety of short legged Alpine cows who eat certain grass and herbs near the tops of snow capped Alps all summer.  We have cheese festivals in castles, a big festival to celebrate when the cows come down the mountain from their mountain herb eating summer holidays, pregnant cow battles to find the queen cow of the region, and a raw milk and Fontina vending machine.  But, as I found out at a wedding last weekend, the cheese obsession isn't just local.  It appears to be everywhere.


At the wedding dinner, I sat next to a man from Gambellara, in the Northeast region of Veneto.  We introduced ourselves, and he immediately asked if I ever tried real Asiago.  I told him I wasn't sure.  He tells me it is so good you can't imagine!  You can get it fresh, and it is like eating a bowl of fresh cream.  You can eat it on everything.  But go 40 km away, isn't not the same, not as good.  You have to eat Asiago in the town of Gambelara, because they have the real one.


I think I need to visit Gambelara.

After I was stuffed silly from the delicious wedding feast, I ended up talking to Antonio, the father of the bride.  He is a gregarious man with a huge personality, and before we were even introduced he had grabbed onto my shoulders and proclaimed, "I come from where they make the REAL mozzarella!" and for the next several hours he told me exactly why Battipaglia, in the region of Campania (in the south of Italy, near Naples) has the best mozzarella of the world.  The mozzarella of Battipaglia is sweeter, he told me, but whatever you do, DO NOT get the mozzarella from Caserta, which is a neighboring town.  They sell a lot, but it's no good.  You need real buffala (water buffalo) mozzarella from Battipaglia.


He told me, "I'm retired.  I work for my family.  I don't smoke, I don't gamble.  What I like is to sit down with a good bottle of red wine and good food.  I make my own wine, and drink a bottle a day, half at lunch and half at dinner.  I come from where they make the real mozzarella.  You have to buy it right when it's made, leave it in its water for a day at room temperature.  Then it is ready to eat.  It is wonderful, you can't get it up here where you live, you can't imagine.

"They come in big balls.  Don't eat them with a knife; it won't taste as good!  You have to dig into the ball with your thumbs and peel it back, break it open and eat it with your fingers.  Like this." As he speak, he is demonstrating exactly how he breaks open the mozzarella and pops it in his mouth.  I could swear that I could taste the sweet cheese melting on my tongue, as he smacked his lips in satisfaction from his imaginary cheese.  The conversation meandered through the subjects of tomatoes and bread, and the obligatory recipes that married the three subjects together, but it always came back to mozzarella.

Antonio already planned out my trip to visit him (and his cheese).  I guess I'm going to Battipaglia!

Tuesday, June 26, 2012

Black Bread Adventure and Zuppa Valpellinese

A few days ago I took my mom and her friend Randy up to the village of Ozein.  It's a paradise...there is no other word for it!  Well, a paradise for people who love ancient picturesque villages immersed in a sea of wildflowers, with breathtaking views of the tallest mountains of Europe.  It's pretty spectacular.  As my momma says, better than a poke in the face.


We decided to try and find the village's community bread oven, because Ozein is pretty well known for their wood fired pane nero festivals. Pane nero, or black bread, is the traditional bread of Valle d'Aosta.  Twice a year (sometimes more often) the villages fire up their massive community bread ovens, and the locals come and bake their bread that will last them the year.  The bread is low and dense, and made with either rye or whole wheat flour.  Some people make it with a starter, others with yeast.  They dry out the bread on racks, and have a special cutter for it so that they can saw off hunks that they then soak in liquid so that it is edible.  For dinner, it can be soaked in broth and made into soup, or for a snack it is soaked in homemade red wine, called zuppa di asino (donkey soup). 


The only bread oven we were able to find is one in ruins near a rustico (half falling down old stone house) that I have been eying for years. Gorgeous, but obviously not been used for many years.  After climbing a hill through the village through a blossoming sea of wildflowers, we saw an old woman on the street, chatting with an old man.  The man left as we approached, and I asked the woman if she could tell us where to bread oven is.  Our conversation went something like this:

me: “Could you tell me where the bread oven is?  My mom is writing a book on them, and we heard the one of your village is wonderful.”
old woman: “It’s just down the hill over there.  But it’s locked shut!  I wish I had the key, I used to have it, because it’s beautiful inside.  I’m so very sorry that I don’t have it.  I would love to take you there.”
me: “oh, that’s ok, we appreciate it.  We’ll look at it from the outside.”
old woman: “We baked bread in it just last Saturday!  I wish you could have come, you would have loved it.”
me: “ You bake bread, how wonderful!  What kind do you make?”
old woman: “pane nero, with whole wheat.  I'm so sad that I can't take you to see the oven. Would you like to try some bread?”
momma: “Sure!”

….old woman goes into her house, and comes out with a loaf of bread, which she hands over to us.  She seemed so heartbroken that we weren’t there for the firing of the bread oven, she wanted to give us a loaf of her bread that she made last December.  Yes, you heard right.  Last December, either on the 14th or 15th, she doesn’t remember which day.  She said it would be good for another few years, so we don’t need to use it right away.


She insisted we take the whole thing (not like it could be easily split, anyways), wrapped it in newspaper, and we went on our way to explore the old village.  When we got come, I called up my friend Angelo, whose mother is famous in the Valley for her zuppa valpellinese, a traditional Valdostano recipe using black bread.  He gave me the recipe, which resulted in a glorious dinner.  If you can scrounge up some dried up whole grain bread, here is an excellent use for it!  Measurements aren’t really important.  Folks here don’t measure for this soup, so neither should you. This isn’t a soup with much liquid in it, and is baked in the oven with Fontina cheese on top.  

Zuppa Valpellinese (for approximately 4 servings)

Ingredients:
-          half a loaf of black bread, or other dried up and dense whole grain bread
-          some butter
-          half a head of green cabbage
-          1 liter of broth (beef broth is traditional, but I use vegetable broth)
-          250 g Fontina cheese
-          1 or 2 onions
First, caramelize the onions, which should take about 40 minutes.  To be honest, caramelized onions aren’t usually added to this, but it makes it so much tastier.


  Preheat your oven to 350 F or so.  Prepare your broth, salting it to taste if necessary, and slice the Fontina.  Slice the bread (or in the case of black bread, get it into manageable sized chunks), and toast it with a good amount of butter.  Take off the leaves from the cabbage, and leave them in pieces as large as your hand.  Blanch the cabbage leaves (put them in boiling water for a minute, and then dunk them in cold water). 


In individual portion sized, oven safe casserole-type dishes, layer the ingredients.  First bread, then caramelized onions, then blanched cabbage, and then Fontina.  If your dish is deep enough, layer until it is filled, always finishing with Fontina.  Pour the broth over your layers, making holes in the cabbage and cheese if the liquid can’t pass through.  Put dishes in the oven for about 45 minutes, and if the cheese isn’t well browned by then, put the broiler on briefly. Serve hot! 


Thursday, May 24, 2012

Light as a Cloud Gnocchi


I love gnocchi.  Not the hard, prepackaged, rock-like nuggets you can buy in a grocery store, but the real deal.  Fluffy little pillows that melt on your tongue, so light that they could nearly levitate on a humid day.  They have those little indentations that hold onto just the right amount of sauce.  They are delicious, and you can eat a lot of them without feeling weighed down. 

They are also quite easy to make, if you know a few tricks.

For 4 servings you will need:
about 1 kg (2 pounds) starchy potatoes that have started to wrinkle
pot of boiling water
1 slightly beaten egg
about one cup of all purpose flour
sauce (in the spring time I love using homemade nettle pesto)

The lovely thing about gnocchi is that measuring is completely  useless.  You just have to eyeball it.   The potatoes you use are important.  You want to use starchy, kind of dried out potatoes.  I like to use them once they start to get wrinkly.  You see, the secret to good gnocchi is adding little flour, and if you use a starchy and wrinkly potato,  that will be much easier.

My friend Alexis grew these potatoes high up in the Alps.  This is what 2 kgs looks like. See how nice and wrinkly they are?


Wash the potatoes, cut them in half (or thirds if they are big), and cover with water.  Boil them until they are tender, about 45 minutes,  scoop them out of the water and let them drain well.  When they have cooled down enough so that you won't burn yourself, peel them, and pass them through a ricer or food mill.  If you don't have one, you could use a potato masher but it won't give you quite as good of a result.

Food mill over a bowl, so that the milled potatoes don't get squished

When you use a mill, like the one above, it finely mashes them and leaves little fluffy bits of hot potato behind.  We want to do this, and while they are hot and then let them cool off a bit, so that as much water from the hot potatoes can evaporate as possible.  This will mean we can add less flour later on, which leads to lighter dumplings. 


Milled potatoes left to cool


Get a pot of well salted water boiling; you can use your potato water from before, or a fresh pot, whichever you prefer. Spread mostly cooled potatoes on a counter in a rectangle, and pour the beaten egg on top of it.  Some people don't use an egg, or use only the yolk, but I like the consistency when I add a whole egg. Then sprinkle about 3/4 c of flour on top.
Potatoes, egg, and flour

Then I take my handy-dandy plastic scraper (I use that tool for nearly everything!) and fold the potato into the egg and flour, and then gently knead it until it comes together into a soft ball.  If it is still sticky, add a little bit more flour.  I usually end up using about a cup of flour, up to 1 1/4 cup.  Any less, they are mushy, any more, and they are too dense.  For fluffy gnocchi, try to not over knead.


Flour your work surface, and cut off a bit of dough about the size of an egg.  Roll it into a 'snake' about the width of a finger, and then cut it into little dumplings about the size of small finger joints. 

This is how I do the next part.  I hold a fork in my right hand, and I put a dumpling on the fork.  Using my right thumb, I gently roll the dumpling up the fork a little.  When you do this, you get a thumb indentation on one side, and fork tong imprints on the other.  This will help your gnocchi hold onto sauce. 


I usually put the gnocchi on a lightly floured plate, or they stick to the counter.  Before the next part, you want to go ahead and put your sauce into a medium sized bowl. 

Then I dump about 15-20 gnocchi at a time into the pot of salted, boiling water.  They will sink and then gradually rise to the top. About 15 seconds after they have risen to the top of the pot, I scoop them out with a slotted spoon, put them directly into the sauce, and gently mix them in.  Repeat until all your gnocchi are done!
Don't forget this step or else the gnocchi will all stick together!
Serve while hot and enjoy!

Homemade gnocchi with stinging nettle pesto from my field

Sunday, May 20, 2012

Crazy Cow Party in my Backyard

I was in the middle of making some gnocchi (post to come soon on that!) for dinner, when my husband Gianluca runs into the kitchen shouting, "Go outside! Go now!  The cows!  They are being funny!"

So of course I tossed down my potatoes, my hands still covered in dough, and I scampered outside.  If there is one thing my husband knows about me, it is that I can't resist a funny cow.  We live in an apartment, for lack of a better word, on a dairy farm.  It is a small cluster of who-knows-how-many-hundreds-of-years-old houses and barns all squished together, surrounded by fields where they grow the hay to feed to cows.  Every day I see the baby cows going in and out of the barn, but I've never seen the mama cows.  I knew that the cows are going up to the alpeggio soon....that is when the cows go on a summer holiday.  The farmers herd their cows up, up, up the Alps to the very high mountain pastures, where the cows feast on tender mountain grass all summer.  This is what gives Fontina cheese its distinctive taste. 
This is what an alpeggio looks like. 

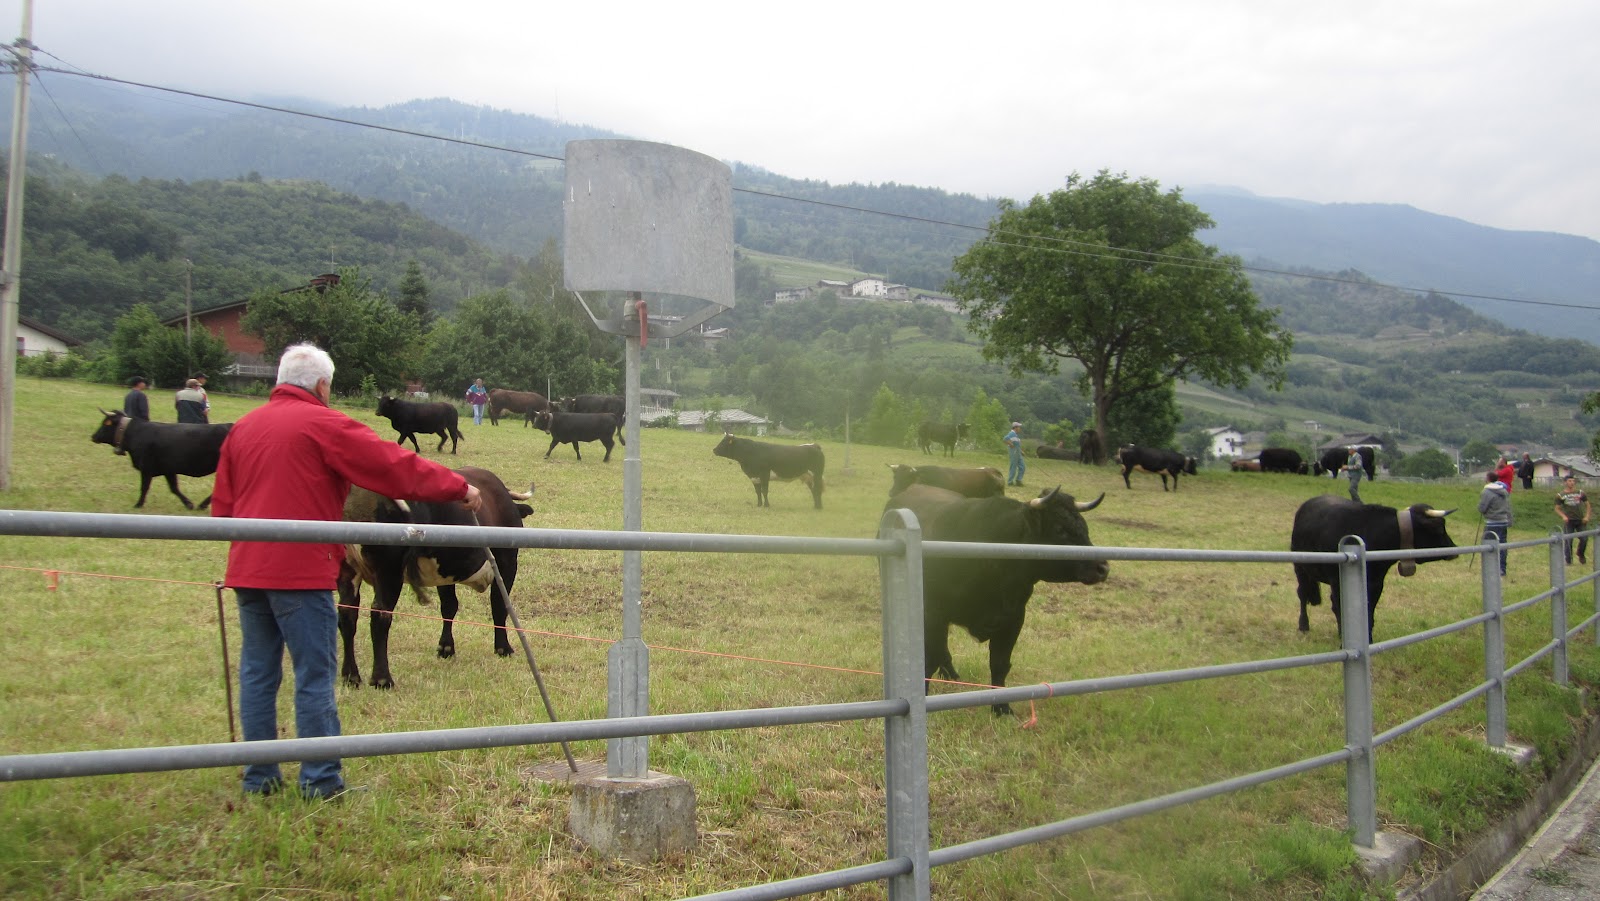
Anyhow, I ran outside and in the field above our house there was a damned cow party going on!  About fifteen cars and farm trucks were parked on the field, and old guys with sticks were standing around, passing unlabeled bottles of homemade red wine back and forth.  Young guys were running around with sticks, chasing after the cows.  The field was filled with cows and they were going NUTS!  They were galloping in circles, chasing each other, and butting heads.  It was like my very own Battle of the Queens.... in fact, I thought maybe they were holding a preliminary battle, there was such a crowd, and so much head butting.
Cows and old guy with a stick
Which one is gonna win?

Let me tell you, a happy cow galloping is a beautiful thing. 

I walked up to one of the old guys and asked him what was going on.  He said they were letting the cows outside to shake their legs out before going up to the alpeggio.  They'd been cooped up all winter and they needed time to go crazy, completely nuts, before making the trek up the mountain.  I'm not sure why it turned into a party...I think parties happen whenever the cows butt heads and the guys carry sticks. 

Wednesday, May 2, 2012

Italian by Osmosis....on learning Italian by living it

When I first met my husband five years ago while walking 1000 kilometers across Spain, I didn't speak a word of Italian. I spoke Spanish (I studied it for 18 years between school and college), and was in the process of trying to learn a bit of French and Swedish. Italian? Not really. I never really thought about the country of Italy much, much less the language.

After that very very long walk across Spain, I spent time in Italy with Gianluca before returning to the US. For the next two years, I went there when I could, which was twice a year. Then, in 2009, I moved to Italy. By that time I could communicate in Italian, but I wouldn't say I could really speak.

What's it like to learn a foreign language by immersion as an adult? It's hard to explain, because I don't really know how it happened. That might sound strange, but learning by immersion just kind of sneaks up on you. I didn't do language classes.... I tried, but I quit after two days. Italian grammar is just so frustratingly complicated that it made me yell and throw books. I figured that I would learn better if I didn't really know I was learning. I thought in Spanish, and I altered Spanish to sound more Italian, because that works well enough. People figured out what I was saying, and corrected me, and I would replace the Spanish word with the new Italian word, or in some cases I tweaked a French word that was similar. In this way, Italian ate my other languages. I can't speak I word of Spanish anymore, as a result.  My Swedish is also gone.  I learned words by comparing them to other languages, or by having people pantomime things out for me. If people around me spoke English, I would ask them what the words I didn't understand meant. I have always completely and utterly ignored the grammar, because I find that I start using it correctly without realizing it.  Studying it makes me blow steam out of my ears. I also mostly ignore the several formal tenses, but they also started appearing more-or-less correctly in my speech. I don't know how to use the subjunctive, or the various past tenses, but I think I use them almost correctly most of the time. Well, maybe not the subjunctive. But I expect that will come with time.
This is me when I study Italian.

In this way, I gradually started understanding. I remember one specific moment about a year and a half ago when I was in the car with my husband, and we were listening to a talk show on the radio. I was zoning it out, until I realized that I understood what the radio was saying. I UNDERSTOOD! Not everything, but enough to know what they were talking about. I started paying attention to conversions around me at parties, and was able to pick out bits and pieces. The feeling that I was understanding at least some of what was going on around me gave me the confidence to leap in head first and try to carry on conversations. I found that I was able to carry on a conversion more easily in Italian than I ever could in Spanish. I think all of my technical grammatical knowledge actually held me back in Spanish. I would be thinking so hard about what the proper way to say something would be that I couldn't get anything out at all. Because I studied Spanish for nearly two decades, I felt like I should be able to speak it perfectly, so I psyched myself out. With Italian, I didn't have expectations of myself, and because I didn't know the grammar, I had nothing to ponder on before I spoke. So, I just let words fly. Sometimes I was understood, sometimes not, but in that way I did learn. Italian by osmosis.

I speak quite well now. I am I guess what you'd call weirdly fluid. I can understand just about everything, say just about anything, and my grammar is often correct, or nearly correct. I can mostly read, and I can't write hardly at all. My accent has gotten a lot better, so very few people can tell I am American from my accent. However, I do still sound foreign, and most people assume I am eastern European when meeting me (it probably helps that I look it), which isn't that great of a thing around here. However, recently someone thought I was Chinese....yeah, I don't get it either.

That said, I'll leave you with two examples of funny slip-ups in the learning process:

-While on vacation, I asked my husband if he wanted to go relax on the scamorza. I was trying to ask him if he wanted to go to the beach (spiaggia), but instead I invited him to relax on the smoked mozzerella cheese.
-I was at my mother-in-law's house for dinner, and I overheard her talking on the phone. I thought I heard her say, "Vorrei un pisellino," and I was shocked because that means "I would like a penis." Apparently I confused pisellino (nickname for penis) for pisollino (nap). She wanted a nap.

Sunday, April 8, 2012

The Story of Genepy the Alpine Bunny

Because it is Easter, I think it is time everyone knows the story of Genepy the Alpine Bunny. She is our household Easter bunny, so this post is in honor of her.

Within the first week or so of when I first moved to Italy in October 2009, I decided it was high time to get a rabbit. I had them growing up, and think they are pretty awesome pets. My friend Morena had to practically drag me away from a pet store flop-eared cutie with the promise of bringing me to get a rabbit from her friend, the Guardian of the Dam.

I'm serious. Try saying that without laughing, I dare you.

A few days later, after darkness had settled over the mountains, we drove an hour up twisty roads that snake their way through a remote part of the valley. The switchbacks were so sharp that they could bite their own butts. We went up, up, up, up, and over a narrow bridge that traversed a pretty enormous dam. Then down a teeny tiny road that had a cliff rising up on one side, and a deadly drop on the other instead of a guardrail. We stopped by a little cottage practically teetering on the edge of the dam, and this little blond, curly haired mountain man hopped out. We all loaded back in the car, driving along the cliff until he had us pull over on the side of the road. Armed with a flashlight and with us unprepared for the snow that crunched underfoot, The Guardian of the Dam lead us to a little shed that was overrun with adolescent bunnies, all skiddish because, I suspect, they knew their fate was to be a polenta topping in a nearby restaurant. I asked if he had any younger ones, and he led me to a trashcan.

Yes, a trashcan. A bunny trashcan.

It was one of the old metal bins from the 70's, turned on its side and cut in half longways. The Guardian opened it up, and it was filled with baby rabbits. It was pitch dark outside, so he kept fishing around until he found one of the little critters, and one by one pulled them out by their ears. It might sound horrible that he kept the babies in the trashcan, but it was actually fixed up very nicely, and was ideal for a birthing hutch. Anyhow, the babies kept thrashing about, until he pulled out a little bunny that seemed pretty happy to have the attention. The bunny was maybe a little less exotic looking than her fiesty siblings, but I knew she was a keeper. He asked if I was sure, and if I wanted a few more to go with it...but I was fine with the one. And I tried to not think about the fate of her siblings. We put her in a box, and headed back to the cottage on the precipice. The Guardian of the Dam fixed us some pasta, and freely poured strong local wine. I don't think he really believed that I wanted the rabbit as a pet, because to him it was so obviously food. I looked on the table and saw a bottle of genepy, a strong local liquor made from a high altitude Alpine herb. With a swig of the stuff to christen her, Genepy the Rabbit got her name.

She's been a great addition to the family, even if she has chewed through every electrical cord in the house. She made up for it by being a very well behaved ring bearer at our wedding. Right now she is loudly snoring in her cage, tired after an afternoon of chasing barn cats out of the yard.


She started out pretty small, but she got big, fast.

Maybe we should have name her Banjo?

See how big she got? Don't worry, she's not that fat anymore.

Genepy built herself an honest-to-God rabbit warren, complete with three entrances.


Monday, April 2, 2012

Raw Milk Vending Machine

I've mentioned the raw milk vending machine before, but it is so cool I think it deserves a post all to itself.

Just to set the scene: I live in a small village across the river from Aosta, a 2000+ year old town nestled in the steepest part of the Alps. So, while I live within walking distance of a lovely ancient town, I also live in an apartment on a who-knows-how-many-centuries-old farm, surrounded by picturesque cow pastures. I forage for tasty wild things for dinner out in those fields, and sometimes chase my rabbit when she's decided to go on a frolic. It's a shame that I am such a horrible photographer, because it is breathtakingly beautiful. The neighboring farm, which is right across the field out (the one outside my kitchen, because there are fields on all sides), has the raw milk vending machine.
This is the field I cross to get my raw milk. I even pass by a tiny vineyard!

The road sign advertising their 24 hour dairy products

'Raw milk vending machine?! What's that?' you say? Well, it is exactly what it sounds like. It is a vending machine outside the barn that dispenses raw milk. The farm is La Borettaz, and they make all kinds of lovely dairy products, including Fontina (real Fontina is only made in tiny Valle d'Aosta, so it is pretty special), brossa, ricotta, butter, and yogurt. When I stop and get milk, I often say hi to the friendly cows in their open barn. They have three vending machines outside the barn, open 24 hours a day. It is super fun to go on a midnight raw milk run. One vending machine is the raw milk machine, where they put vats of straight-from-the-cow milk. It's pretty strong tasting...these days it is hard to find milk that actually has flavor. This milk usually has the slightly herbal tang of Fontina, and is delicious. There is a machine that sells milk bottles, and finally the machine that sells other dairy products.

The vending machines, a giant picture of Queen Cobra, and the lovely snow capped mountains

Ta -da! Raw milk with the push of a button.

The cheese/yogurt/butter vending machine. It even gives back change.

Cute baby cows coming to say hi


The other really cool thing about this place (besides the obvious fun of walking across a wildflower filled field with milk bottles in hand) is that they have the 2009 & 2010 QUEEN COW of the region, Cobra. 'What the heck is a queen cow?' you are probably wondering. The 'battle of the queens' is one of the most important sports of Valle d'Aosta. All year there are preliminary battles between the toughest cows of all the villages in the region, and then there is a final championship between the winners of all of the dozens of preliminaries. The championship is held in the Cow Dome. Yes, we actually have a stadium build specifically for this. There are three weight divisions, and the contestants are nearly all the short legged, dark brown mountain cows who produce the milk for Fontina cheese. They put two cows near each other, and then after munching some grass, pooping, and pawing the ground they usually start pressing their heads together. They push against each other until one cow decides they've had enough and then they run away. The remaining cow wins. The cows are required to be pregnant, so that they won't hurt each other. It's something that cows do all of the time in the fields to determine the pecking order, so I don't really feel bad about watching them do the same thing I see every day, but in a stadium.
Two potential queens duking it out, cow style

Anyways, La Borettaz are the proud owners of Cobra, who won the 'Battle of the Queens' two years in a row! And I can say that I drink the raw milk of a champion.