Tuesday, March 8, 2011

Used cowbells, sexy underpants on the street, and love graffiti

First, today is 'La Festa della Donna', which translates pretty much as 'Festival for Women'.  It's like mother's day but for all women.  The men are required (by which I mean that if they don't, they get bitch slapped) to buy the special women in their lives this particular kind of little yellow flower, which I don't know the name of.  Women traditionally get together and party without the men.  It's a pretty cool holiday, if you ask me!  I was listening to the radio in the car today about the history, and from what I gleened from half-listening to a fast-speaking Italian radio DJ, it's been going on 100 years, and is a day to remember the persecution and lack of rights women once had.

This was while I was driving through town, and I passed by the Tuesday market, so I stopped by.  Man oh man, I wish I had my camera with me so you can understand the hilarity of an Italian market.  See, in France, the markets are amazing because the farmers, cheesemakers, and winemakers come out and you buy their incredibly delicious home made goodies from them.  In Italy...well, it's more like a flea market.  The funniest part today was there was a table selling farm equipment, including used cowbells of various sizes.  See, cowbells are highly important here because there are a plethora of cows.  However, right next to the cowbell table was a sexy lingerie table.  There were mannequins dressed in sexy teddies and see-through thongs and a rack of  very very very risque under-things.  Actually, not underthings.  Sexy teddies and matching thongs.  Pretty much all see-through.  It was just pretty funny to me to have an old lady selling these overly risque lingerie on the street, next to used cowbells.  That's Italy for you!

Next on the agenda:  In every city, of every size, there is graffiti. Which, coincidentally, is the same word in Italian.  Of course we have some of your run-of-the-mill graffiti, where a stupid teenager scrawls something illegible to try to act like a bad-ass, but what we have most of is LOVE graffiti.  People declaring their everlasting, undying love for someone Including Aosta, where I live, and I have made a habit of taking photos of the particular sweet scrawlings on the walls. I was going to wait until I amassed a larger collection, as I've photographed only a tiny fraction, but here is something to get you started.
"Peace doesn't only say no war"
"And...I love you...how it is... I have never been in love with this/and...I love you, I love you truely/and...I love you, I love you I swear/and... I love you for my entire life/and...I love for your mistakes
"I LOVE YOU...forever...my darling!"
"Beautiful"

Saturday, January 29, 2011

Wine, Music, and Cheese IN A CAVE

This is my Italy.  Music & wine in strange locations.
There is a fabulous thing in Italy, really and truly magnificent.  It's called 'Cantine Aperte.'  It translates into English as 'open cantine.'  Generally, you pay a small amount as entrance (5-8 euros, depending on the event), they give you a glass, and you get to go buck wild tasting as many wines as you want in as many places as you want.  They also let you stuff yourself silly with traditional foods that are supplied aplenty, while listening to rollicking traditional music.  That's the general gist of it.

I'm a physicist, so let me provide you with this simple equation to make understanding easier:

Wine cellars opening doors+wine glass+food+music+good company=good time

This was the second one I've been to.  The first one was right before my wedding, and took place at all of the fancy-pants (AKA delicious) vineyards near my house.  The cool thing about this is they gave you a thing to hang your fancy-pants wine glass around your neck.
My darling Aunt demonstrating proper use of a wine glass at a Cantina Aperta

Now, this one I'm writing about today wasn't fancy-pants.  It was a big freakin' party in the streets of a small town called Donnas.  It's in the southern part of the valley, and a cute little town where they make really fantastic wine.  Donnas wine.  It costs a pretty penny in the US if you can manage to find it.  As one of the few fiddlers in the region and part of the traditional music scene here, I was lucky enough to get to play in one of the open cantines.  I think it might have actually been someone's personal wine cellar, I'm not really sure.  We hauled our instruments through the streets, and entered through the back door, with a special knock, to where a bunch of little Italian ladies were busily preparing  'Zuppa alla Valpellinense' (or if you prefer it patois, the regional dialect, 'Seupa a la Valpelinentze').  It is a funny sort of  cabbage soup that is topped with bread and Fontina cheese that is baked in the oven.  It's quite tasty.  They prepared huge sheets of it for the hundreds of wine-heads pouring through the door and milling in the streets.
Pans full of the cabbage-bread-Fontina soup ready to be eaten by pub crawlers
After eating and drinking an appropriate amount of local wine, we launched into playing.  There was another fiddler, upright bass, button accordion, piano accordion, mandolin, guitar, percussion, bagpipe, whistle, and my husband on the banjo.  We were squished together, quite literally, and I kept poking folks in the nose with my bow.  It was a little wine cellar with arched stone ceilings, and we were perched together wherever we could squeeze ourselves, while locals likewise squished themselves together while drinking vin brule (hot mulled wine).  It was a pretty great time.

 
All photos of us musicians squished together in a jolly manner, underground, amid wine and partygoers

However, we eventually decided to take the party elsewhere.  We played randomly in the streets, until we stumbled upon the best thing ever.  Seriously.

A cave.

Yes, a cave.  In the center of town.  It had an entrance a bit like any other building in an alley way, except it opened into a real cave.  I don't think it was dug out or anything, I think it was just there and they build this village around it, and others, thousands of years ago (not kidding...2000 years would be pretty accurate).  But this cave was way more awesome than your average cave.  It not only had hundreds of bottles of wine ready for everyone to drink, but some GIANT cheeses, waiting for us to eat.  Like, man-size cheeses.  Anyways, we marched in there, hopped up on some big rocks, and started playing our guts out amid the drunk and merry locals, man-sized-cheese, and endless bottles of wine.  It turns out that caves have incredible acoustics.
A giant cheese in the cave

Music, jolly Italians, cheese, wine, in a cave!
Not content to leave well-enough alone, I was recruited on the street to join a band that was in search for a fiddler.  They asked me if I played 'populare' music.  I translated that as 'pop' music, so I responded that I used to play in some classic rock and punk bands as a teenager.  They looked at me like I was a bit crazy.  They proceeded to start playing some music that sounded a bit like some kind of traditional music, and people started dancing what looked to be some kind of traditional dance.  It was simple enough, so I played along and jumped around while doing so, as I'm prone to do.  I found out later that 'populare' means traditional music.  Apparently they play traditional southern Italian music...so no wonder they thought I was a bit crazy when I told them I used to play in a punk band when they asked me if I played their music!

But, yes.  If you can go to a cantine aperte, do so.  Especially if you get to party in a cave. 

Monday, January 17, 2011

Battle of the Queens


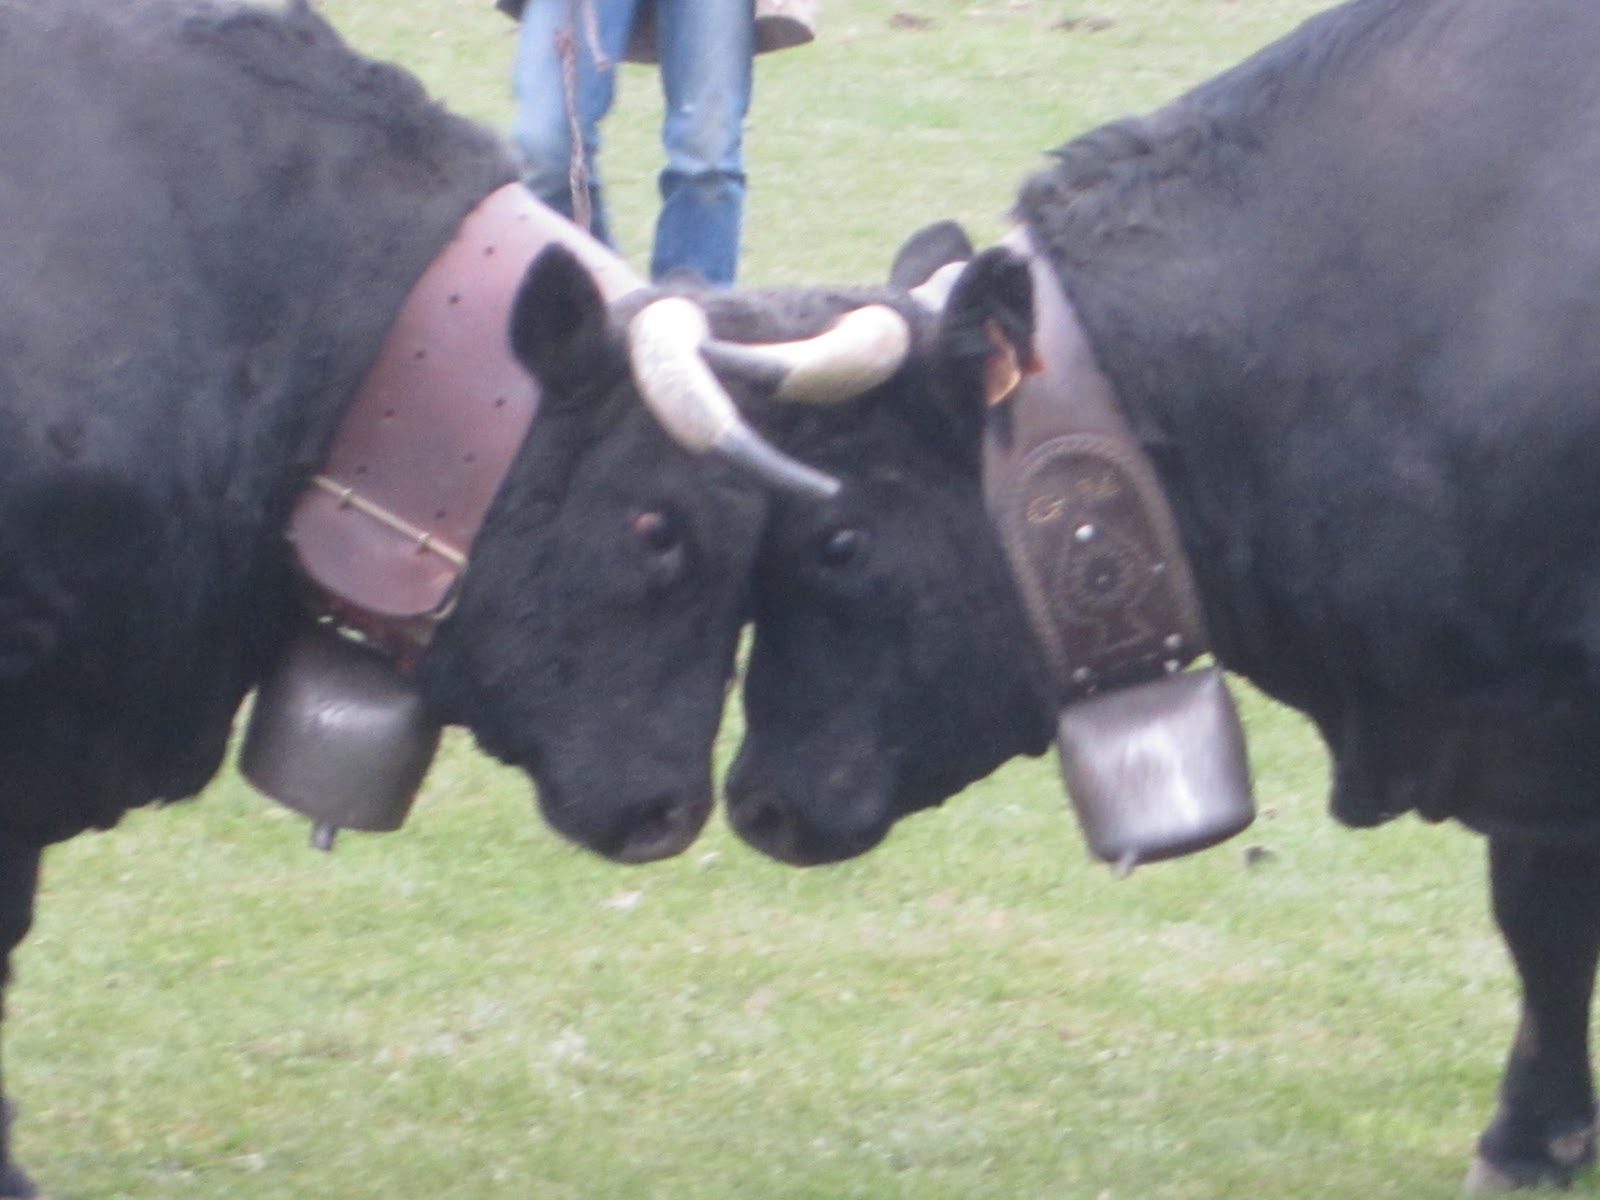
It seems that most things in this lovely valley I live in revolve around cows.  The beloved Fontina that is eaten at every meal, the cows standing the the middle of the road blocking the traffic on the way to work, regional competions for leather workers who make very fine cow bell collars, metal workers who make special cow bells, a giant festival for when the cows come back down from the mountain at the end of the summer…. And the battle of the queens  (Bataille des Reines). 

Who are the queens, these strong females battling it out to become the queen of the entire region of Valle d’Aosta?  They are cows.  Not big fat stubborn women of the human variety, but rather of the bovine sort.  It is one of the biggest events of the year, held annually on the 4th weekend of October and countless people gather with ample food and wine to watch the top cows of the region literally battle it out in the annual finale.  There are about a dozen preliminary rounds in the preceeding months to establish which cows get to be in the big battle, before all of the eyes in the valley.  


At first, I was very perplexed by this, and didn’t like the idea much.  I’ve been a vegetarian for nearly 20 years, and am firmly against the mistreatment of animals in any manner.  I thought  it sounded cruel, until I realized (by watching the cows in the pasture around my house) that this is just what female cows do on their own every day in every field, everywhere, to establish the pecking order.  They don’t hurt each other, but just butt heads and lock horns until one gets bored and runs away.  The remaining cow wins, and when she has battled it out with all the cows in her field, and they all wandered away before her, she becomes the top queen of the field.  This spectical is essentially establishing a pecking order for the entire region, and everyone wants to watch.  It is actually quite lucrative to have the winning cow; that cow instantly is worth a fortune, as is all of their offspring.   I am proud to say that the neighboring dairy (the one across the field that I get my cheese making milk from) has THE queen cow from both this year and last year.  So, my cheese is made from the milk of a queen!  Queen Cobra. I would personally be a little wary of milking her.  


(video I shot at the Bataille des Reines.  It's a fairly 'active' couple of minutes, and it represents the cow aspect of the event pretty well, I think.  Personally, I thought the people watching was way interesting.)

The whole event is really peculiar.  At the gates there are young women dressed in traditional Alpine clothing.  They sell decorated cow bells, local cheese, cheap beer, and cotton candy.  The thousand or so people have all brought copious amounts of food and drink, spread out in the hundreds of picnic tables overlooking the arena.  It is all pretty much traditional food.  Big rounds of darkened cheese, hunks of dark and dry bread, barrels and unmarked bottles of home made wine, piles of aged sausages, and even a big old half eaten hairy leg of what I presume to be a goat or pig... feet, fur, and all.  People are wrapped in blankets, holding a knife in one hand, a giant hunk of cheese in the other, with a bottle of wine beside them.  The leap up and cheer when their favorite cow wins, and look downtrodden with their cow runs or wanders away.  There are at least 5 different TV news stations covering the event.  Below the picnic area, there is the barn, where hundreds of beautiful brown cows are being lovingly coddled by their owners, or teenagers are sitting on their feed bins sneaking drinks of wine, and texting friends.   Some of the cows even have corporate sponsors, with the name of  the companies name engraved onto the cows’ decorative face plates.  Another strange aspect: the cows absolutely must be pregnant.  The explanation I have heard is that pregnant  cows are much less likely to get into a violent fight. 
The ladies resting up for the fight

Barrel of (likely) home made wine

Yes, that is a leg of a critter amid fontina cheese, wine, and grappa

Italians must have fresh, delicious coffee no matter where they are

homemade pickles, mocetta (salted meat), fontina cheese, and wine

blood sausage, cheese, and genepy (local homemade herbal liquor)
The arena is quite big, and it is made especially for this event.  The venue is called 'vaccodromo', which literally translates as 'cow dome'.  Also, Bob Dylan got to play second fiddle there, so to speak, when he performed there some years back.  My husband, having been to both the cow battles and the Bob Dylan concert, says that more people were at the last cow battle than at the concert.  These people have their priorities straight!
Look! Here come the Queens!

There are six cow battles going on at a time.  They put two cows near each other, with their owners nearby, and usually the cows stand around, chewing their cud, pooping, and occasionally pawing the ground.  At some point, after a few minutes or maybe even a half hour, one of the cows head butts the other, and they clash horns a bit.  One of them eventually gets tired of it, and scampers off.  Sometimes the winning cow goes running after it, and then the various owners and random observers, start chasing the cows around to prevent them from trampling people, which sometimes can take a good bit of time.  I often saw the owner of the losing cow kiss his beloved cow on the head, and give it friendly pats.  These men really love their cows. 

My mom was visiting at the time, and went with me.  She turned to me and said, ‘Annie, you live in a really strange place’.  It’s true, I do.  People gnaw on furry, hooved, goat legs while watching pregnant cows butt heads, in an isolated valley in the Alps.  I just love it!

Wednesday, December 29, 2010

My Second Winter: Musings about living here for more than a year

I've now been living in Italy for about 14 months... and I have to say that the reality of living here is different than I expected.  Some things are better, some are worse.  Some just, well, different.  I'm finding that I am much more homesick that I expected.  I have lived all over the place, in various parts of the world, but until now there was always an end point, like living in Asheville until I went to college, or living in Greensboro until I graduated college, living in Ireland until my visa expired, or living in Kentucky until I finished grad school.  Now that I am living in Italy and married, there is no 'end point', which I find to be fairly unsettling.  I love my husband and I love Italy, but I still get 'itchy feet'. 

I think I never got very homesick before because in the various places I have lived (or traveled to for extended periods), I always knew that I'd return to my family between each adventure.  Now, home is in the snowy Alps, and I am (probably) permanently on the other side of the globe from my family and lifelong friends.  To cope with this, I'm clinging to my Appalachian roots a lot more than I expected.  I play more Old Time music now than I ever did in the US, I'm always cooking southern food (pies, biscuits, cornbread, fried green tomatoes, roasted squash, etc), just made a patchwork quilt for a friend's baby, we are learning to brew beer at home because Italian beer generally tastes like poo, and I sometimes talk to myself in an empty house in a strong southern accent to keep myself company. 

That's not so say I haven't embraced the local culture, because I have.  I have a much deeper appreciation for wine than I ever did before, am enamored with the local cheeses (and am having some success making them myself), my favorite place in the world is inside the 2000 year old aqueduct up the road from here, and I can chat pretty well in Italian now.  I don't stand out as obviously as I did a year ago, and am learning how to maneuver my way through the Italian way of life. 


Things I like here
-Socializing generally revolves around food and cooking
-There are GIANT snow-capped mountains poking up everywhere.  Seriously, it is crazy.
-I can see glaciers from my kitchen
-Just about everyone can cook and they (nearly) all appreciate good, well made food
-Roman ruins absolutely everywhere, and the 2000 year old town I live outside of has 2000 year old walls surrounding it. 
-The pace of life is slower.  Things happen eventually, and people aren't rushing around like headless chickens
-There are still the small specialty shops.  Bread shops, pastry shops, meat shops, pasta shops, cheese shops, wine shops, chocolate shops...even shops that ONLY carry socks. 
-I can walk 5 minutes to get raw milk from the dairy vending machine.
-I can walk 2 minutes past to a great produce market where they grow much of what they sell. 
-The Italian language is beautiful
-The 'aperitivo'.  It translates as 'appetizer'... but it is so much better. Before dinner, when you go to a bar and get a glass of wine, they have a spread of tasty little appetizers that are included with your drink.  In the US, folks go out for a cup of joe.  Here, folks go out for an aperitivo. 
-FREE (or cheap, in some cases) medical care and medications!
-cheap public transportation exists in multiple forms, even if it isn't always reliable because the drivers are on strike what seems like half the time
-cobblestone pedestrian-only streets
-My giant rabbit, Genepy, who was saved from being cooked in a polenta sauce.  She weighs 6 kilos, and snores very loudly when she's not following me around like an imprinted duckling.

Things I don't like
-The Italian language is hard, especially when people talk fast, in dialect, strange accents, and use funny expressions
- If you have a prescription medicine, you must go every two weeks to the doctor to get a new prescription.  Even if it something you have to take for your whole life.  And then the Pharmacy probably doesn't have it because everyone is always on strike
-Bureaucracy.  I know it sucks everywhere, but here the laws change so often that no one (seriously! no one!) knows them even if it is their job.  Which means nothing ever gets done, and they end up doing funny things.  Like, I couldn't start working until my house was measured. 
-I don't know where to go to buy random things... like stickers, for example. 
-Ingredients are different.  If I want to make foreign food, like Mexican, I need to bring the ingredients from the US.  So I have a freezer full of masa harina, grits, cornmeal, and biscuit flour I hauled over since those things don't exist here. 
-Traveling ain't so easy when you live in a snowy, narrow valley in the middle of no where in the Alps
-I really, really miss my family... thank goodness for Skype, though.
-Most people want to eat my pet rabbit
-I feel like a baby because I don't have an innate knowledge of how to get anything done here, as I would in the US.  I want to sell jam and homemade cosmetics.  What offices do I need to go to so that I can start the process? Who knows!

It's a balance.  I love it here, but sometimes it annoys the living daylights out of me.  Overall, the balance is tipped in the direction of 'yippie, I love it here!', but it isn't always easy.  Life the past few months has been particularly crazy, as I stopped working as a medical physicist after only 6 months (contract issues... I was actually quite good at my job), and we are working towards running a B&B later this year.  It's one that someone we know already started years back, and needs someone to run it (me! me!).  I discovered that I have some kind of crazy natural born talent for jam and cosmetics (lotions, creams, etc) making that I will try to capitalize on.  My language skills are far better than a year ago; now I can talk to most people about most things, even if my grammar is...crappy.  It is dark and gloomy and snowy here, but I think we actually have far less snow than in the US at the moment, and snow is to be expected in the Alps, I suppose.  It's so strange... in the winter, the view literally looks like a black & white photo.  Everything is in shades of gray. 

Another thing...until a couple of years ago, dancing (lindy hop and contra dancing) were my life since about 2001.  I haven't hardly danced a step since I moved here, and it kind of feels like something has died inside of me as a result.  I still feel like a dancer, if though I don't really dance anymore.  However, upon realizing that, I bought myself a ticket to Barcelona for the New Year, so I am rocketing off tomorrow morning to dance for a few days! I also bought a pass for the European Swing Dance Championships in June (also in Barcelona), so that is another thing to look forward to. 

Oh, one thing I didn't mention above, but since it is Italy, it must be said.  The shoes here are gorgeous. 

Monday, December 27, 2010

Homemade Veggie Burgers! mmm....

 
There are a good few things I want to write about, but since a number of people have been asking me about this particular topic lately, I'll go with it!

A bit of background: I've been a vegetarian for 18 or 19 years now, and I take care to make sure that I have enough protein in my diet, as it can be easy for a veg to overlook.  A lot of vegetarians just grab for their jar of peanut butter (if they live in the US), a block of cheese, or a can of beans and call it a day.

But... why do that when you can make something that is more balanced, tasty, AND easy?  Veggie burgers are the staple of many veggie diets, but generally they are the type that are in a box in the frozen food isle.  Even if you go to a nice restaurant and order a veggie burger, it is...well, always from my experience....from a box in the freezer.  It never occurred to me that veggie burgers were something that normal people could make at home, until my husband got me a really great book, Veggie Burgers Every Which Way, by Lukas Volger. I have to admit, I am terrible about following recipes.  I generally just look at one to get inspiration, and then go my own way.  I followed some recipes in this book the first few times, but now that I just make 'em up as I go, and they turn out great.  I really do recommend this book, though.

A note on beans: Yeah, you can used canned beans, but they are generally loaded with preservatives and just aren't as tasty as the real thing.  The 'real thing' is easy, you just have to think of it in advance.  Before you go to bed, put some dried beans in a bowl, cover with water, and leave them there for 12 hours, plus or minus whatever time is convenient to you.  Rinse and then put in a pot and cover with fresh water and simmer til done.  Time will depend on the bean.  They are so much tastier this way.  And cheaper. 

Ok, so here is the 'Easy Bean Burger' recipe at the beginning of his book, slightly adapted.  It really is easy! And tasty! And versatile! You can also make them into tiny patties to put on a salad, which is fun.  And you can wrap up uncooked burgers and stick them in the freezer for up to 2 months. 


Easy Bean Burger
1 1/2 cups cooked beans
2 beaten eggs
1/2 cup roughly chopped fresh parsley
1/4 grated parmesan
2 teaspoons Dijon mustard
1/2 teaspoons salt
14 teaspoon freshly ground pepper
squeeze of fresh lemon juice
3/4 cup tasted bread crumbs (plus more if needed)
2 Tbs olive oil
(Optional tasty things to add in: chopped fresh sage, pesto, chopped sun dried tomatoes, chopped walnuts, etc)
**if you don't have all of these ingredients, don't worry.  The necessary ingredients are the beans, eggs, salt & pepper, bread crumbs, oil... but it is better with the other things.

-Preheat oven to 375 F
-Mash the beans in a bowl, and fold in all ingredients except for bread crumbs.  Then add bread crumbs, and add more if it is too loose.  It should be nice and wet.  Let sit for 5 minutes or so for the crumbs to soak up extra moisture.  Shape into 4 patties (or more, if you want mini burgers).
-In an oven safe skillet (like cast iron pan), heat oil over medium-high heat.  Add patties and cook until browned on each side, which should take 5-10 minutes total.  Transfer the pan to the oven and bake 12-15 minutes more until the burgers are firm and cooked through.  (if you don't have an oven safe skillet, cook over heat in whatever you have, and then cook in the oven on something that can go in the oven, like a cookie sheet or aluminum foil.

Serve however you want! I like to make my own buns (so easy! Get that book I told you about for the recipe.  Or just make normal bread, using half whole wheat, and form into balls, and use an eggwash to make seeds or whatever you want on top to stick) and also to make my own baked french fries and pickled red onions. 

Thursday, December 9, 2010

Operation: Cheese Making Part III

In addition to making those other tasty cheeses in previous posts (especially queso fresco...mmmm!), I've been working on two new cheeses!


Cheese #7: Molded Cheese Rounds

This is basically a farmer-style cheese, made into to little rounds.  Before trying them, I thought 'TOMINI!', but alas they were only tomini in form, although they were still tasty.  Tomini are a common cheese fresh around here, and I'm trying to find a recipe so I can make them, too.

Anyhow, this was my first cheese made using cultures.  For how much cheese is made around here, no one seems to have a clue as to where I can get cultures.  I think that the local cheese makers probably have their own cultures that they propagate, and most folks just don't make cheese at home anymore.  So, although I live in the land of cheese, I ordered my cheese making cultures from the UK. 

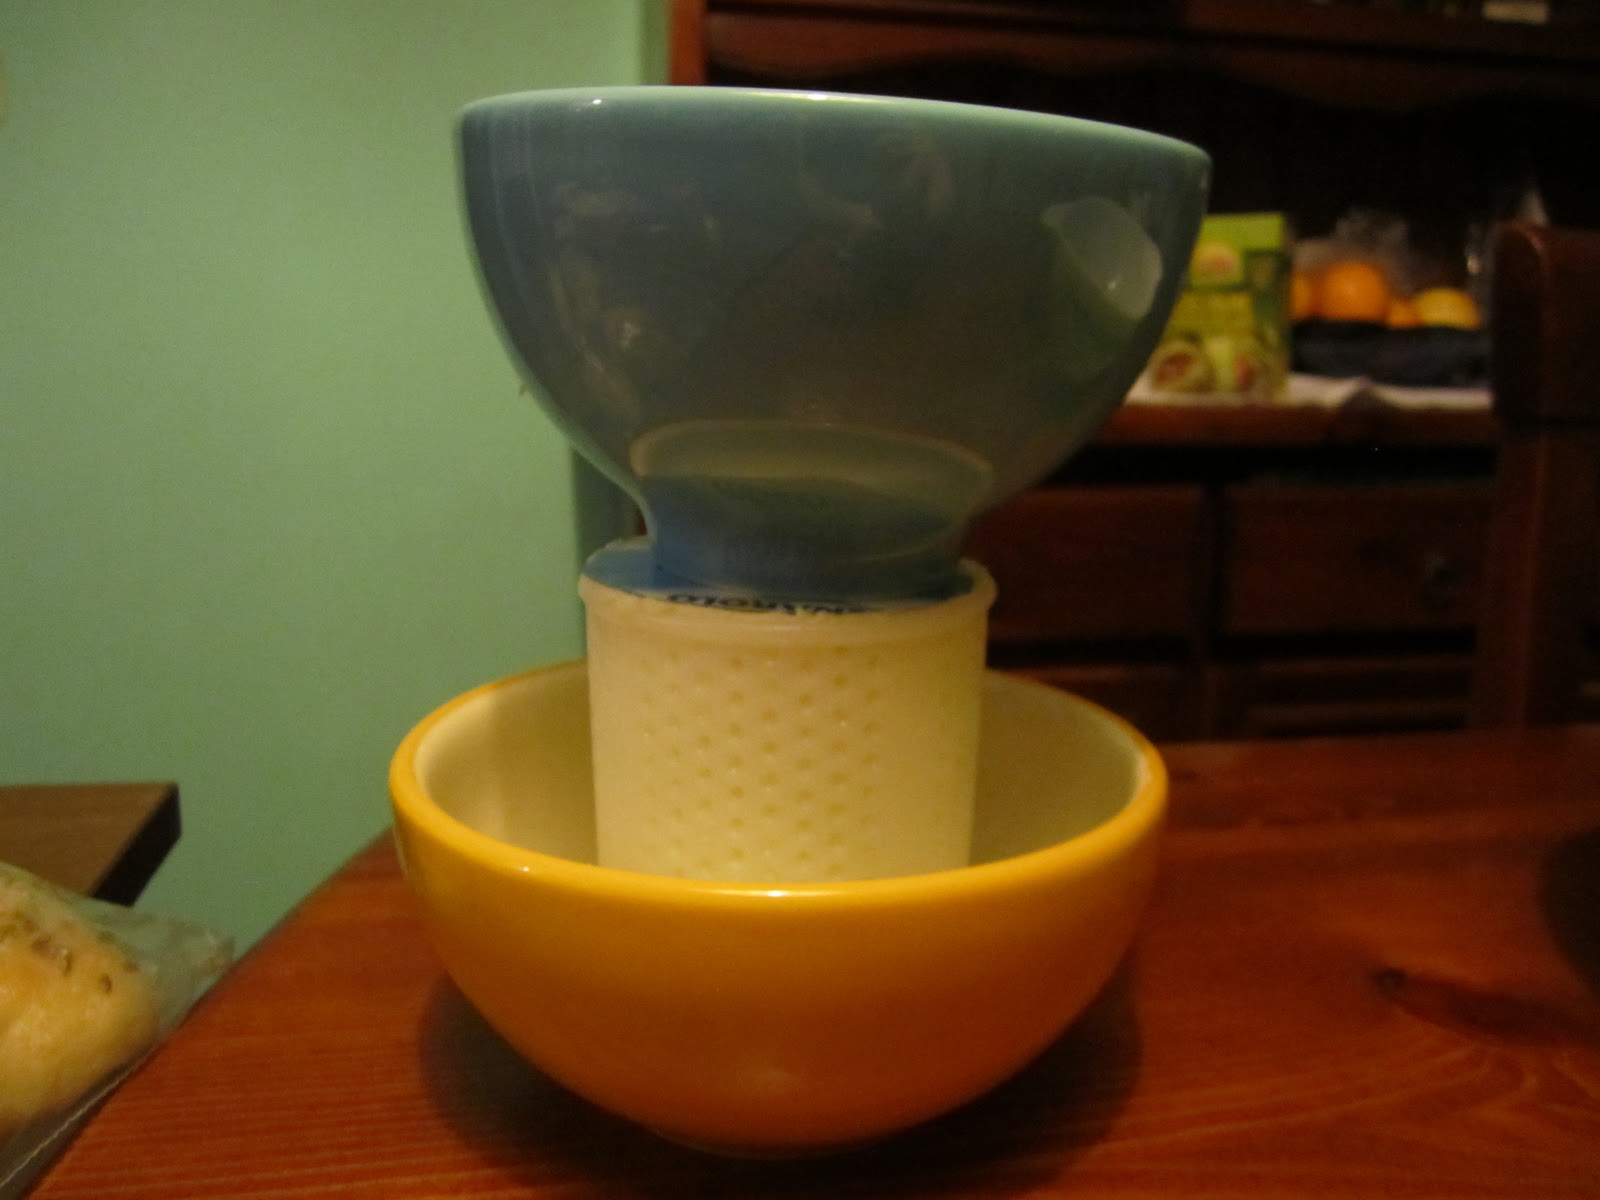
For this cheese, the ingredients were milk, a mesophilic (low temp) culture or buttermilk (which doesn't exist here), rennet, and salt.  The molds were made out of paper cups with holes punched in them, and it was pressed with other paper cups filled with water. 


 I was supposed to gradually heat the milk in a simmering double boiler removed from heat, but as I pasteurized the raw milk first and was too impatient to cool it and then reheat it, I just let it cool down to the right temperature. 
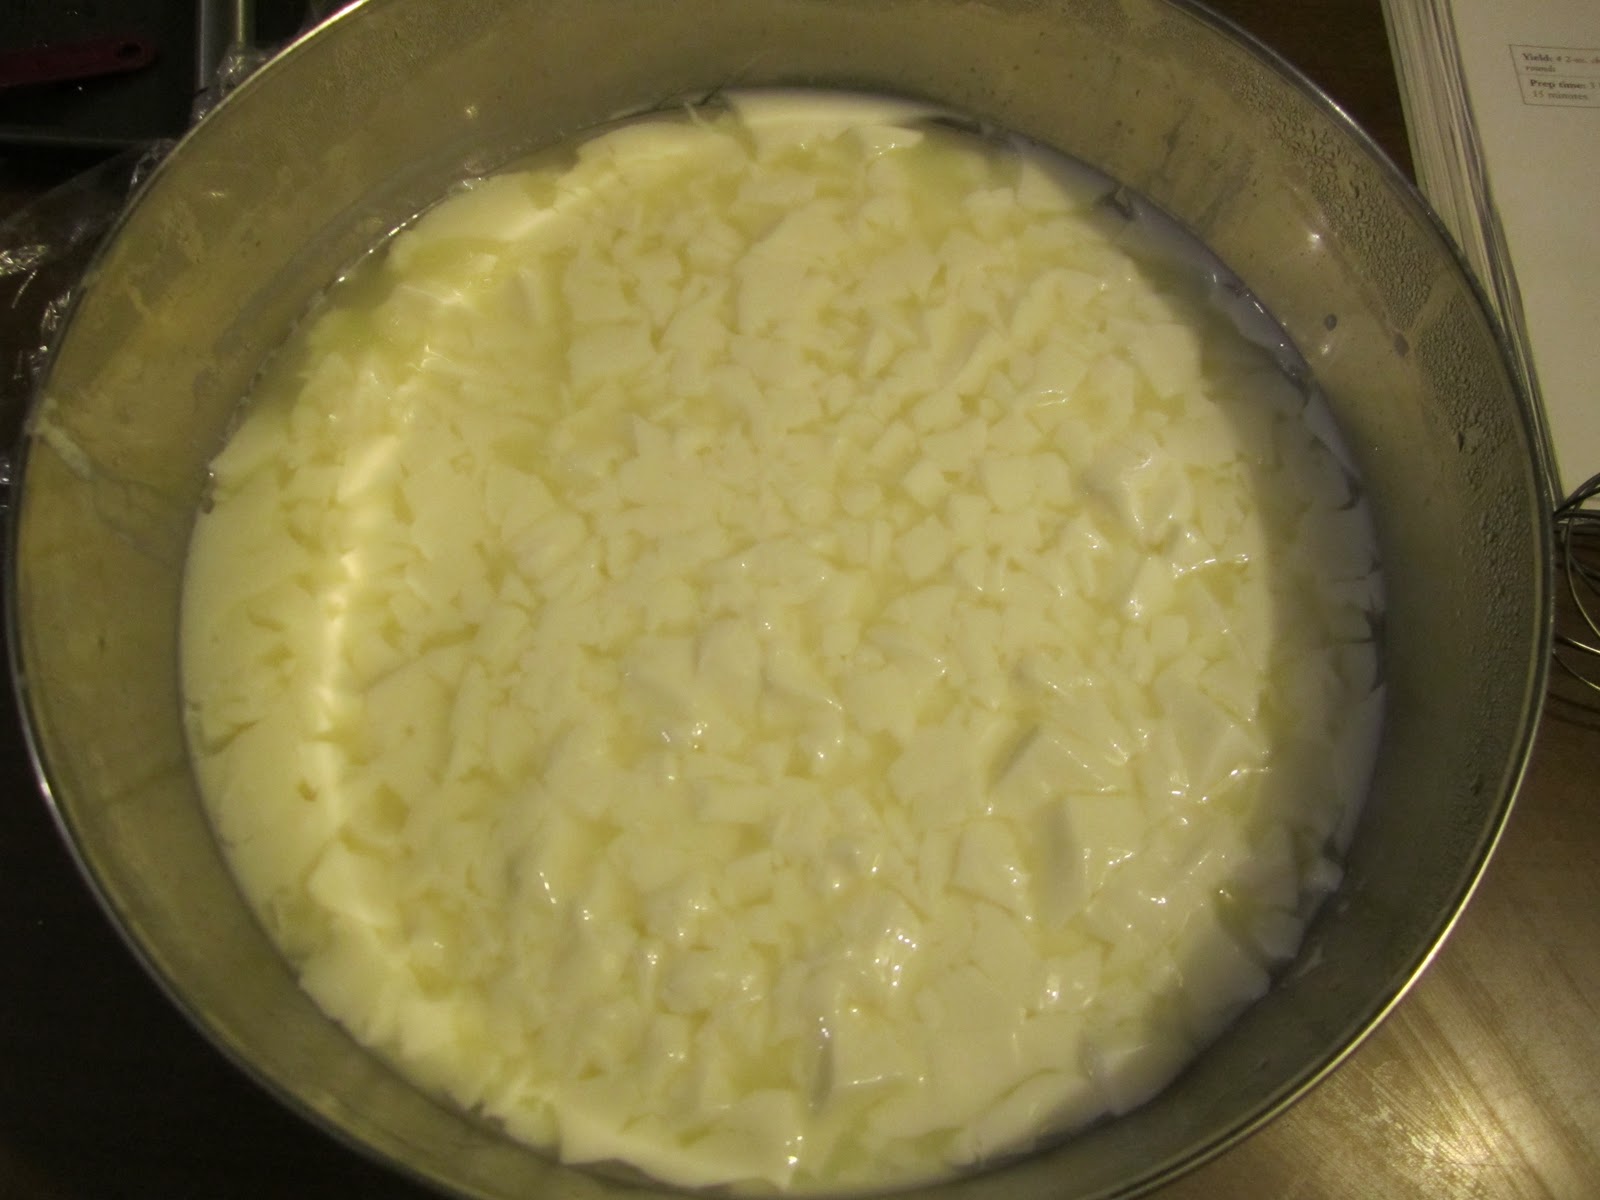
 I added the mesophilic starter, and had to let it sit for an hour.  It started smelling nice and cheesy after that! Then, I added the rennet and let it sit for another hour.  Then, the miracle happened.  So, SO cool.  The milk turned into a gel-like solid.  As if the whole thing turned to jell-o.  It was pretty darn awesome.  I cut the curd with a whisk, heated them back up, drained, salted, and then divided the curds up between the cups. I pressed the cheeses, turned them (hard to get those darn things out!!!), keeped pressing, turned, and left the little cheesy suckers overnight.


  Then I took them out, let them dry off a bit, and VOILA! Cheese! They are really tasty, especially with a little bit of just pressed olive oil mixed with a little bit of pesto drizzled on top.


 Cheese #8: Ricotta Salata

Ricotta Salata is basically pressed, molded, salted, and slightly aged ricotta.  There are different ways to make ricotta... directly from the whey after making mozzarella, milk added to whey, or just from milk.  Add acid, and you have ricotta curd, and strain in a cheesecloth.  Then you pack it all into a mold (I was lucky! I finally found one... the last one for sale!...in a farm shop at the bottom of my driveway), and press it.  I don't have real cheese presses yet, so I had to improvise.

See? Lovely cheese in it's mold.  I made the mistake of not sticking in in with some cheesecloth the first time, and it got stuck, so I learned my lesson and it's now living in cheesecloth in the mold.  As with the other molded cheese, it needs to be flipped in the mold a few times that first day.

 Out of the mold! Isn't is beautiful?  This is before it's salted every day for a week, and then aged for a month.  I just finished the last salt rub (I see why it is called salata, as it will be SALTY) yesterday, and need to wait for 1 to 3 weeks more before diggin' in.  I'll let you know how it turns out!

In  other, very VERY exciting news... I spoke with Reuben the Cheesemaker yesterday at the Mistletoe Festival.  He makes fantastic goat cheese.  I've been to his place at the top of the mountain a couple of times before, and actually was there when a goat went into labor and gave birth, which was incredible.  He said that not only can I buy goat milk from him, come February when the goats give birth again, but he'll teach me to make cheese!  They are only making cheese for 10 more days until spring, so I will be going up there soon, to apprentice with a fantastic cheese maker.  

Thursday, November 18, 2010

No-Knead Bread

I know that this is so 2006, and it's been written about probably ten thousand times, but it's so good and simple that I must also contribute to the plethora of blog posts about this magnificent bread.

No-knead bread hit the mainstream audience in November 2006 with this article in the NY Times.  It was a baking sensation that overtook the nation, as much as home baked goods can.  Foodies everywhere were talking about it.  I heard about it, and was curious, but never  tried it or made it until this past week.  To put it simply, it blew me away and I'm obsessed with it.  I'm also in the process of making my third loaf in one week!  I'm not someone who is generally a 'bread eater', as most bread isn't worth eating in my opinion.  I am in love with the wonderful fermented breads made in France, but that's about it.  My bread's got to be fermented, take multiple days to make, have a chewy crumb and rustic thick crust,  or I generally won't touch it.  However, I usually don't take the time to make this sort of bread at home, so I usually go breadless.  Unfortunately, in this part of Italy, the bread generally...well, sucks.  Italians, at least around here, treat bread simply as a utensil to mop up the juice on their plates and to push food on their forks. 

I think the no-knead revolution has just hit Italy, though.  It's similar to a ciabatta, but possibly tastier.  It is also easier to make.  Last night we had a small dinner party at our house, and the three guests gobbled up the whole loaf and all requested the recipe, which I then had to translate into the metric system.

It's an extraordinarily simple process, and the only important piece of kitchen equipment is something like a Le Creuset, or any other heavy pot (cast iron, terra cotta, etc) with a good lid. However, since we will be heating it up to a high temp, to be on the safe side you might want to unscrew your lid handle and stuff the hole with a piece of aluminum. 

  You add your 4 ingredients together in a big bowl:
3 cups flour
1 1/4 tsp salt
1/4 tsp yeast
1 5/8 cups water
 (later you will need a little corn meal, wheat bran, polenta, or something like this)

It will be a wet, shaggy mess.  Then you cover it, leave it in a warm-ish place, and let it sit undisturbed for about 18 hours.  It will grow into a significantly larger wet mess, dotted with bubbles, emitting a nice yeasty smell even though hardly any yeast is used.
After the 18 or so hours are up and it looks all bubbly and ooey gooey like the photo above, flour a work surface and gently pour your dough onto it.  Sprinkle dough with a little flour, and fold it in on itself one or two times.  Cover and let it sit for 15 minutes.

Very quickly form it into a ball, only using enough flour to keep it from sticking to your fingers.  However, I found that it doesn't want to be a ball, it wants to be a sticky blog.  Anyhow, make it as ball like as possible, and place the goopy mess on a tea towel (or as we say in the US, dish towel, although it doesn't sound as nice) that has been coated with your cornmeal/polenta/wheat bran/something like that, UGLY side down.  Or, shall I say, uglier side down.  Sprinkle some more of whatever you used (l like using mill ground cornmeal or polenta) and cover with another tea towel.  Leave it for 2 hours.  It'll rise some, as bread is prone to do.

30 minutes before your rise is up (which is 1 1/2 hours after it started on its second rise), stick your pot with its lid on in an oven preheated to 450 degrees Fahrenheit. 

CAREFULLY take it out after that time is up, and dump your dough into the hot pot so that it is 'ugly side up' AKA seam side up.  Trust me, it will make end up beautiful.  Wiggle the pot back and forth a little to make sure dough gets evenly distributed.  Cover with the lid and stick it in the oven for 30 minutes.  Then, take off the lid and cook for another 15 minutes or so until it is a lovely golden brown.  Dump it out of your pot and let it cool on a wire rack before eating.

It is delish.  Now it is time for me to prepare batch #3 for its second rising! 


 See how lovely it is?  It's turning me into a bread-lover, and will probably make me fat from carb-overload

 Nice crumb inside resulting from the day of letting it ferment... yum!


The reason you need this pot is so that bread has a shape (otherwise it will turn into a long flat blob), and most importantly, to develop a good crust.  Because the dough is so moist, when it cooks it gives off a lot of steam.  Cooking it in a hot, lidded pot is basically like cooking it in a tiny steam-injected oven, which means that you get a fantastic texture and taste out of your crust. 

Tuesday, November 16, 2010

Pie, the mysterious food art

Pie making is truly an art.
A 'good' pie tastes good and looks good. An utterly fantastic pie that makes your toes curl and moans escape your throat has so much more. Not only are the innards tasty and cooked/prepared to perfection, but they use fresh, seasonal ingredients, and are a combination of simplicity and some sort of unexpected 'wow' factor. The crust must be tender, yet flaky (even the bottom), a perfect light golden brown, and beautifully crafted. It should be so beautiful that you can't bear to cut into it, but the tendrils of eau d'pie wafting towards your nostrils make it so that you MUST try it, and once you do, you want to devour the whole thing in one sitting, but devour it slowly, so as to appreciate all of these elements which make the pie so perfect.

I usually don't have the energy, unless it is for a special occasion, to attempt to make a supremely fantastic pie. I usually settle for 'damn good'. I constantly have people asking me to reveal my secrets of pie making... but here's the thing. They aren't secrets. I'm happy to share everything I know.

First, I will post a few pictures of what I think are some extraordinary pies, some made my me, and some not. Most of not all of the photos come from my family's annual Pie Party, which is probably the best event in the world.

Anyone who knows her, will tell you, but Brookes Wolfe makes a killer pie, and she can make the most beautiful crusts imaginable.  Not only does she have some gorgeous leaf action going on, but she has a rope edge on it, which is hard to do.  I think the innards were trusty combo of apples and berries, which you can never go wrong with.

One of my pies.  If I recall correctly, it was a lemon-lavender-raspberry pie with a berry and rosewater glaze, with a leaf crust edge and crystallized calendula flowers. 

David the Baker's 'Upside down chicken pie'.  It was a combination of beautiful and terrifying.  From what I understand, it was delicious, even with the claws leering at you (I'm a vegetarian, so I didn't try it).  He butchered the chicken himself, made an interesting crust, and had extreme shock value to make this pie memorable.

A beautiful creation from my mom, Barbara Swell.  You can probably see where I learned to do the leaves from! This was a roasted veggie pie, and it was a combo of beautiful and wonderfully tasty.

Another of my mom's pies.  while it might not be a show-stopper in appearance, it is by far the best thing I ever ever tasted in my entire life.  It was a blackberry pie with a layer of dark chocolate on the bottom.  When I ate it, I shouted out 'OH MOMMA!', and that's what this kind of pie is called now.  Holy crap, you can't imagine how amazing this was.  An unexpected twist on a traditional pie, that adds to the flavor, and makes it so incredible that you scream out for it when you sleep... that's what I'm talking about.


Thanksgiving is coming up, and that means pumpkin pie for most folks. It's not a show stopping pie, but it certainly goes into the 'damn good' category, especially when you make it will a real pumpkin, as opposed to the canned variety. I'll start you off with a recipe for that (don't worry, by the end of this post you'll be able to make a stellar crust as well!). This page in my recipe book is covered with so many spills of all of the ingredients that the pages stick together and it's hardly legible anymore. It's that trusty of a pumpkin pie recipe. I swear by it.  The difference between this and most other pumpkin pie recipes is that it only has one egg, so it is denser and not eggy.

Mrs. Painter's Pumpkin Pie
from: The Lost Art of Pie Making Made Easy, by Barbara Swell

1 1/2 cup pumpkin puree
1 1/3 cup evaporated milk (I use whole milk and it's just fine)
1 egg
3/4 cup brown sugar
pinch salt
1 Tbs. flour
1 tsp each cinnamon and ginger
dash of freshly grated nutmeg.

Mix all ingredients well, and pour into an unbaked pie shell. Bake in a 350 degree oven on the bottom rack for about 45 minutes or until the middle is firm. Cover the edges with foil if needed to keep from over-browning."

You know when this is done when you wiggle it a big and the middle doesn't slosh. This is one of those pies best eaten once it's been cooled off, and preferably refrigerated. The crust has a tendency to finish before the insides, so pay close attention once you hit the 1/2 hour mark, remember that foil is your friend to keep crusts from burning!
Pumpkin pie I made yesterday cooling on the windowsill


Now, for the crust...

Many folks have fear of crust. And I don't fault them for it, because a good pie crust is a tricky thing, and there are a lot of terrible crusts out there. But there are some fantastic ones out there as well, and that's what I'm going to write about now. Some people like to make different types of crusts for different pies, but for most pies I use the same basic recipe, as it works well for just about everything. It's how I learned to make it from my momma, the undisputed Queen of Pie, and it's won me 'best crust' in the giant pie contest nearly every year.

First, a couple of things that will help you, before giving you the recipe:
1) Use good ingredients. That should be obvious, but if you use discount flour and discount butter, it's not going to be good. If you want good pie, use good ingredients.
2) Keep your ingredients (especially butter) very very COLD. I can't emphasize enough how important this is.
3) Work the dough as little as possible.

Ok, so now for your ingredients. This is enough for a 1 crust pie that fits in a 9" pie pan. If you need a 2 crust pie, just double the recipe. I don't measure exactly, as I eyeball it all, but this is theoretically what I am doing:

1 cup white, unbleached all purpose flour (King Arthur brand is reliable)
1/4 tsp salt
1/2 tsp sugar
very small amount of baking powder (little less than 1/4 tsp)
5 3/4 Tbs very cold unsalted butter
small bowl of ice water with a juice of half a lemon squeezed into it (you'll use about 5 Tbs of this water)

Mix dry ingredients together. Some folks say sift, but to be honest, I've never sifted anything in my life and it all turns out just fine. Cut your butter into cubes (approx 1/2 inch), and using a pastry cutter, fork or tips (seriously! only the tips!) of your fingers cut in half of the butter, until it is like course crumbs. This step makes it tender. Then cut in the rest of the butter, until it is the size of small peas. That makes it flaky. Get your icy lemony water, and stir in the water one tablespoon at a time. Stir it with a fork, and it's done when it BARELY holds together when you squeeze it. Don't you dare make a wet dough, because it will be nasty if you do that. It will seem kind of dry, but as long as it barely sticks together, it's fine. At this point there is an optional step, which I'm not sure if I can describe, and feel free to skip. There's a French name for this technique, but I haven't a clue how to spell it, just how to do it. I quickly form the dough into a ball (don't touch it too much, you'll melt the butter!), and then I put it on a slightly floured surface and using the heel of my hand, I push it down hard into the ball of dough and push it away. This helps with the flakiness. Then I form it into a flattened ball.

However, you can skip that if it seems too much, and you can go ahead and make your dough into a flattened ball. It shouldn't be more than an inch thick. Wrap well in plastic wrap, and put it in the fridge. It needs to rest for an absolute minimum of a half an hour, but several hours or even overnight is ideal. The resting period of the dough in the refrigerator is important.

When you are ready, take out your dough, flour a surface, and get out your pie plate and rolling pin. When rolling out a pie crust, you want to roll in a way so that you are pushing out from the middle of the dough. I never ever bring my rolling pin to the edge of the dough, as it isn't necessary, and will only screw you up. After ever roll or two, it's good to pick up and rotate the dough a quarter of a turn, and make sure it's not getting sticky from butter melting on the top or bottom. Don't over-flour, as it will make your crust bitter, but flour enough it keep it from sticking. Roll until it is about 1 1/2 inches larger than the top of your pie pan all the way around.

Carefully lay your crust into your pie pan, so that it sets nicely in there. Use a knife to cut off the jagged bits over the edge, or the parts where it is too big. You want about an inch or a bit less of 'over hang'. You are going to tuck this behind the crust, so that you have a nice rounded edge along the rim of the pie plate. Got it?

Now, to 'pretty-fy' it. There are a number of things to do, but I'll tell you the simplest ways. If you are lazy or frightened, you can take a fork and gently press down the edges along the rim of the pie plate. I personally find this ugly, but some folks like it. OR you can do the following: With your right hand, hold out your thumb and first finger so that there is about a centimeter's space between them, and hold out your first finger on your left hand so that it is pointing into the space between the fingers you are holding out on your right hand. Having your fingers out like this, go to your crust, with those right two fingers on the outside of the top edge, and your left finger on the inside. Bring these fingers together, so that your left finger basically pushes the dough into the little space created by your two fingers on your right hand. Then, do this to all of the pie. Voila, it is beautiful!
                                          (image from http://localfoods.about.com)

At this point, I like to cover it with plastic wrap and let it refrigerate for another 15 minutes or so. If you will be blind baking, you need to poke holes in the bottom with a fork. Otherwise, use as the recipe says.

If any of this isn't clear, let me know and I'll try to clarify.  If you know someone who is a good pie baker, it's best to learn from them, as making pie is an art best learned from another.  If not, try anyways and you can always ask me for advice!

As my mom wrote in her book that I reference above, "Pie has intrigue. Pie is adventure, mystery, romance, and love."  What more could you want in life than that?

Wednesday, November 10, 2010

Operation: Cheese Making Part II... Mozzerella, Ricotta, & Seras

And the cheese making adventures continue!

On to ‘real’ cheeses… that is to say, those that involve more than separating curds from whey and squishing the curds together. Only slightly more involved, and way more fun.

Cheese #4: Mozzerella


Now, there are 2 different main ways to making mozzerella; one way takes two days, and the other takes less than an hour. My ’cheese making for idiots’ teaches the one hour method, although I am keen to explore the 2 day method, because apparently it keeps better.

My friend Denise came by to do this with me. She’s never made cheese, either, but she has childhood memories of her grandmother making simple cheeses in the kitchen, so she has an idea of what should be going on.

As I said in the previous post, I am trying my best to follow the directions to the letter. However, all of the Italians I talked to thought that the recipe called for too many additional ingredients (like calcium chloride and cultures). I think it is because normal American milk (which the book was written for) has been overly processed, whereas I have tasty raw milk at my disposal which apparently already has the appropriate cultures living in it. And upon some research, the calcium choloride is used to counteract the pasturization process, but it also helps to work with the cheese so that it is stretchier. So, I followed the ingredients. A gallon of raw milk, a 30% calcium choloride solution, citric acid, rennet, flaked salt. I had to approximate the measurents, since the book was written for Idiots in America, but I am an Idiot in Italia, where we use the metric system, and I have liter milk bottles. Yeah yeah I know I am a physicist, so I am capable to making exact conversions, but also because I am a physicist I am ok with making approximations.

Did you ever hear the joke that goes something like, Q: ‘why did the chicken cross the road?’, A (from a physicist): ‘Well, first we have to assume a spherical chicken….’.

Anyhow, it felt more like a fun science project to make mozzerella, like I was back in chem lab. Making solutions, dealing with acids, boiling stuff, etc. A combo of the rennet and the citric acid coagulated the milk, and the calcium chloride helps bind it together. The secret is to get out as much of the whey as possible from the cheese, and to keep it quite warm while working with it. First we kneaded it, then stretched it, like taffy, and tied it into lovely knots. It ended up being very very tasty, and much better than the normal mozzerlla that one can buy in the shops (which is still much better than American mozzerella). The only problem is that I think we overworked it, so that it was slightly tougher than it ideally should have been. Otherwise, it was quite perfect.


The raw milk, fresh from the vending machine:

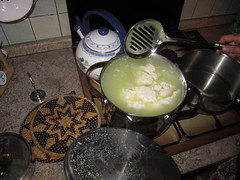
After heating the milk, adding the other ingredients, and letting it sit for 5 minutes, the curds clump themselves together!

Kneading the cheese to expell liquid and create tasty layers

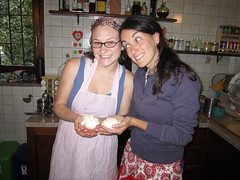
Operation: Mozzerella succeeded! Myself and Denise.

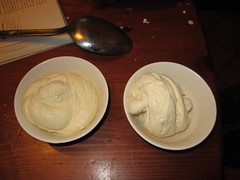
A closer look at our newest cheese

Cheese #5: Ricotta

Ricotta is made using the seemingly useless byproduct from mozzerella: the whey, which is a kind of greenish liquid. It must be used right away, as it starts to go bad within a few hours. We heating the whey up to the right temperature, added 2 liters of raw milk, got it back up to the previous temperature, and then added 6 Tbs of fresh lemon juice to once again coagulate it. Drained it in a cheese cloth, folded in some flaked salt, and let it drain. It ended up being extraordinarily good. I generally don’t like ricotta whatsoever, but this one was fantastic. It was creamy, and had a good flavor.


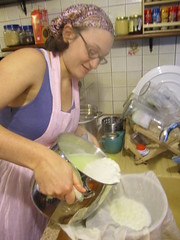
Making ricotta... pouring the curds and whey into the cheesecloth

After it drains, we have ricotta!


Cheese #6: Seras


Seras. What the heck is seras?! you are probably wondering. It is the final dairy byproduct of the whey, and apparently it is a word in the regional dialect, and not the official word. Absolutely no one here that I have talked to know what it is called outside of Valle d’Aosta, but that is what they call it here. It involves adding a fair amount of apple cider vinegar to the hot whey after the ricotta is made, and waiting until all of the curds possible separate out. At first we thought it didn’t work, until we realized that you really need a huge amount of whey to make a decent amount of seras. After pouring all of this through the cheese cloth and letting it drain, we got about a tablespoon of very fine, creamy, and grayish cheese out of it. To be honest, it kind of scared me (I hate vinegar, and it spelled to vinegary to me… plus grey cheese? Ew!), but my cheese-hating husband loved it.

The next step in the cheese adventures is to start making cheeses that need to be aged a bit. The only thing I am really worried about now is that the milk from the cows around here is so particular, which is why they only make a couple kinds of cheese around here (primarily Fontina and Toma), which have very particular flavors. The raw milk already tastes quite a bit like Fontina, so every cheese I make also tastes a bit like Fontina. I might have to hunt down some ‘normal’ cows that aren’t used to make the local strong cheeses.

bread from a french market, garden tomatoes and basil, the mozzerella we just made, with a balsamic reduction